Contract

Add a guestbook to your website

The Guestbook add-on is designed to provide a space on your website where your visitors can leave feedback and comments about your website or service. Enabling the Guestbook add-on and managing messages is simple.


Why publish a guestbook on your website?

Websites need to provide information to your visitors, but successful websites should be organic, growing over time, in response to the needs and expectations of visitors.

A site guestbook is the perfect way to:

  • Engage your site visitors, by providing them with their very own space on your website
  • Gathering invaluable feedback from your visitors or clients about your site and the services you offer
  • Plan new content, and adapt existing site content and features, to meet the needs of your audience

Enable your site Guestbook

It takes only a few clicks to add a guestbook to your website. Head to the Add-ons > Manage add-ons menu of the site manager, and move your mouse over the Guestbook add-on.

Click Enable, choose whether or not to automatically add links and menu widgets, then click Enable to confirm.

Viewing your guestbook online

Your Guestbook is now published online. By default, it’s accessible at the address http://your-site-address/guestbook - you can change the address at any time, from the Add-ons > Guestbook > Options menu of the site manager.

  • Once messages are added, they’ll be displayed on your guestbook page, in order from oldest, to newest.

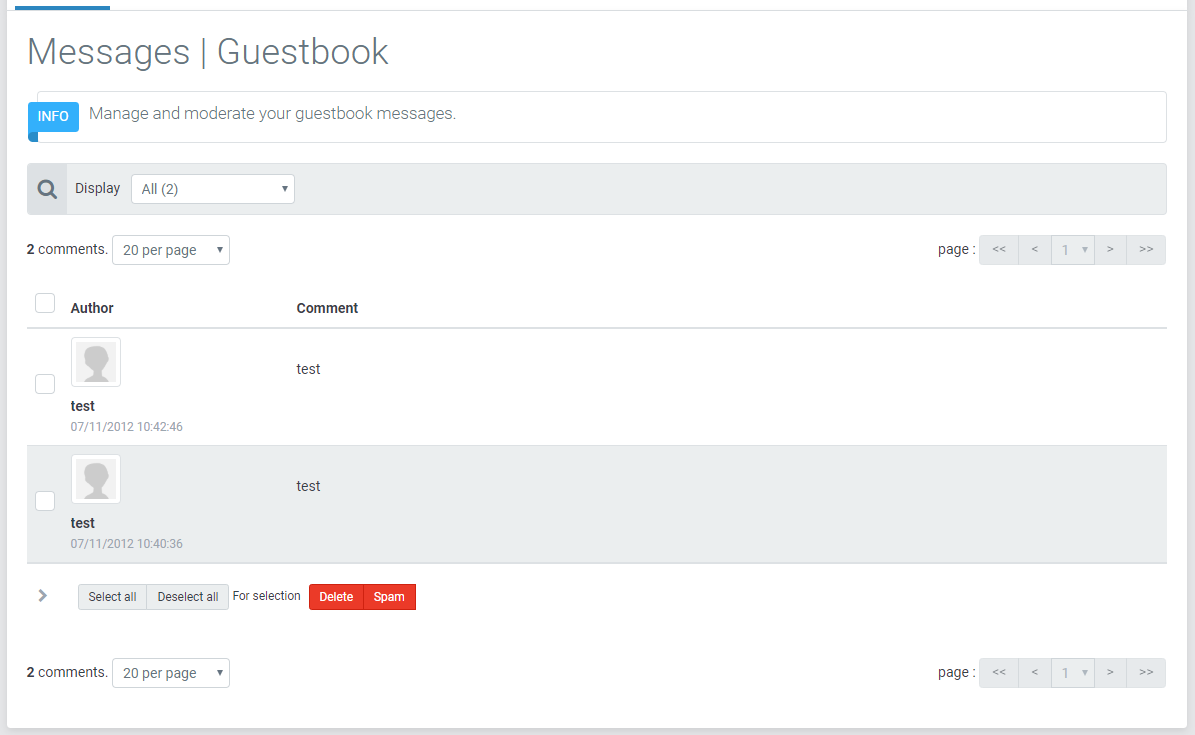
Managing Guestbook messages

Once visitors to your website have left a message on your website, the message will either be published immediately, or remain unpublished awaiting your approval.

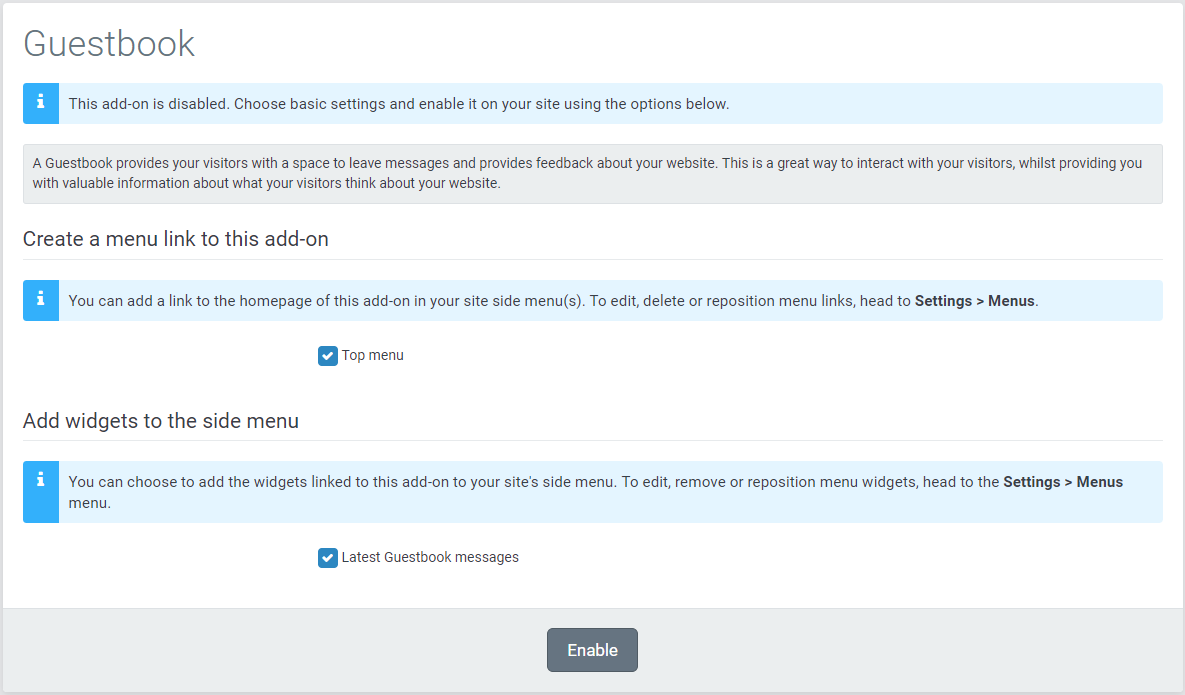
Messages added to your guestbook are managed from the Add-ons > Guestbook > Messages menu of the site manager. Published messages appear on a white background, unpublished messages appear on a yellow background. To filter the messages displayed in the list, use the drop-down menu at the top of the list to select only the published or unpublished messages, or to view those that have been treated as spam.

  • To choose how to handle messages (whether they should be approved automatically or manually), access the site moderating settings from the Settings > Global settings > Moderating menu.
  • To publish, delete, edit or unpublish a message, move your mouse pointer over the message, to access the relevant link.
  • See this tutorial for more on managing messages.

Managing the Guestbook Options

From the Add-ons > Guestbook > Options menu, you can:

  • define the number of messages that will be displayed per page – any additional messages will be displayed via pagination buttons on the guestbook page on your website.
  • add a content that will be displayed at the top of the guestbook page on your website – use it to add a welcome text, images, videos or other content, to encourage your visitors to leave their feedback
  • personalize the title, address, and meta keywords, description and image for the page – the image will be used on sites like Facebook when the page is shared by visitors.

You can also choose the menu template to use for the guestbook, from the plugin settings at the bottom of the Options page.

Displaying Guestbook messages in another page or menu

Guestbook messages are automatically published on the guestbook page of your website. You can also display the latest messages added to your site guestbook in another page, or in the side menu of your website.

To display the latest guestbook messages in your side menu:

  • head to Settings > Menus
  • add a new widget: Guestbook > Latest Guestbook messages
  • personalize the title to be displayed in the menu, and the number of messages to display
  • save your changes

Add them to a page using the Other widgets > Guestbook > Latest Guestbook messages widget.