Scenario: to understand this tutorial, here is a practical example: a small website with different menus on the homepage, the photo album and the contact form.
On the homepage there will be:
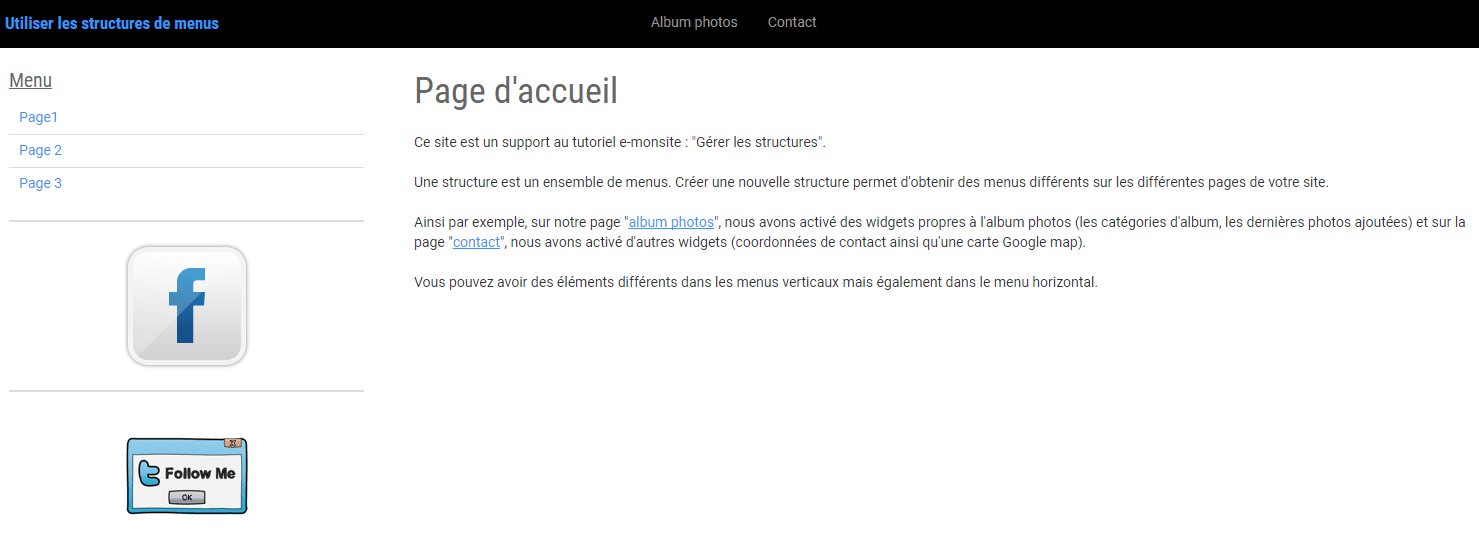
- A horizontal menu with a link to the photo album and a link to a contact form.
- A vertical menu with 4 elements: the list of the site's pages, a link to the Facebook page, a link to the Twitter account, and an RSS feed widget that shows links to the 3 latest posts of the emyspot blog.
On the Photo album page there will be:
- in the horizontal menu: a link to the homepage and a link to the contact form.
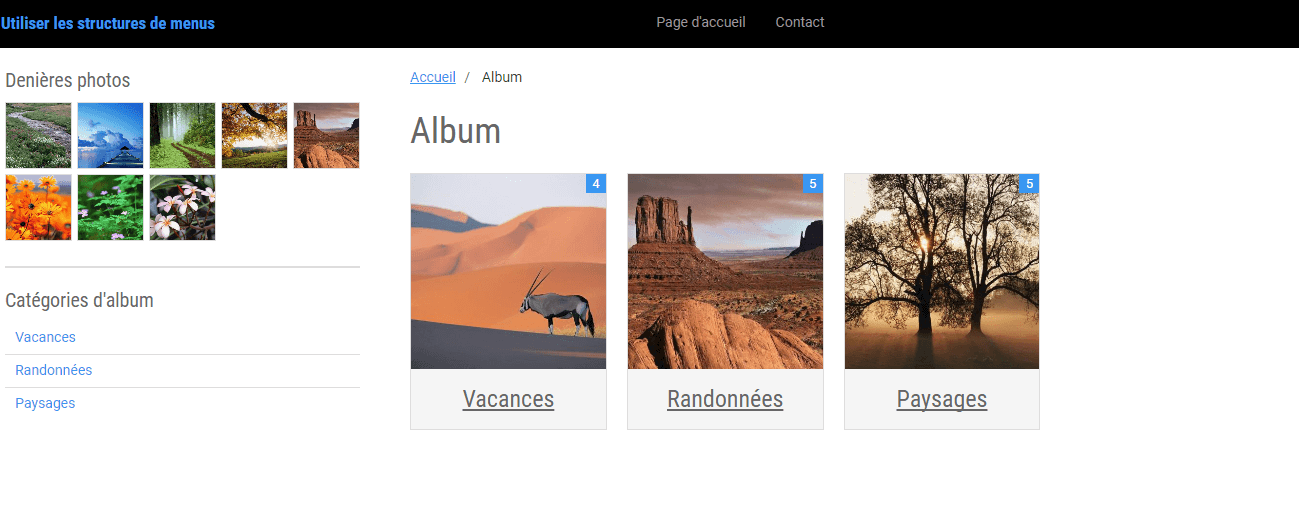
- in the vertical menu, two widgets: the album categories and the latest photos added to the album.
On the Contact page there will be:
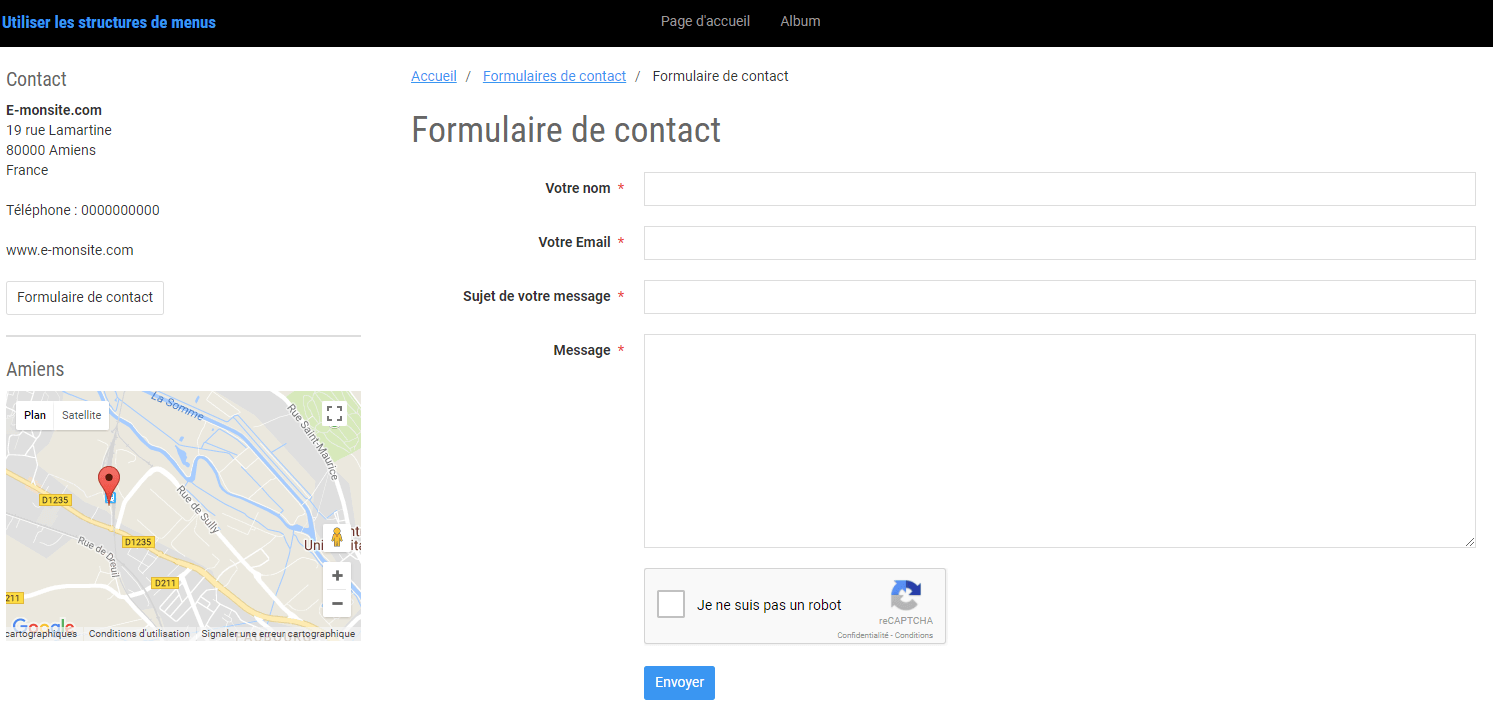
- in the horizontal menu, a link to the homepage and a link to the photo album.
- in the vertical menu, the contact details and a Google map.
Create a menu template
If you have never used menu templates, you only have one: the default template. So you have the same menus on every page of your website.
To create a new menu template, go to Settings > Menus. Click New template and give it a name. Choose a meaningful name so you can easily find it in the list of templates.
In our example, we need 3 menu templates:
- one for the homepage
- one for the photo album
- one for the contact form
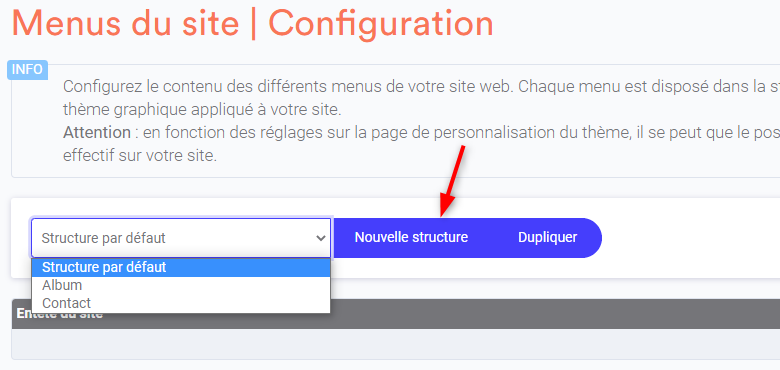
Since there is already a default template, we will keep it for the homepage. So we will create an Album template and a Contact template.
Link a menu template to an area
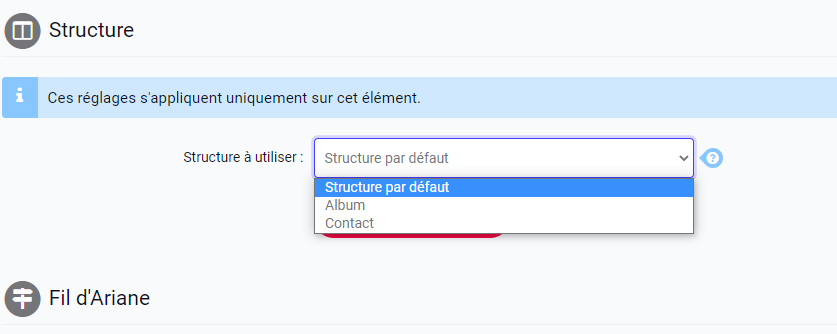
To link a menu template to an area, whatever the area (a page, a page category or a whole add-on), you need to go to the plugins. So, to link:
- a template to an add-on, go to the add-on's Options (for example, the options of the Poll add-on). At the very bottom, in Plugins, you can assign a menu template to the add-on.
- a template to a category of an add-on, select the category, then click the edit button. Then click Plugins to see the list of templates.
- a template to a page, open the page as if you were editing it and click Plugins at the very bottom to see the list of templates.
In our example, we have 3 templates to link to 3 areas:
- The default template for the homepage. In the plugins of the homepage settings, the default template is the one applied.
- The Contact template for the Contact add-on. Go to the Contact add-on options and, in Plugins, choose the contact template. Save.
- The template named Album for the photo album add-on. In the photo album options, apply the album template.
Add widgets to the menu
To add or remove items in the vertical or horizontal menu, you now need to take into account the template you are editing.
So, in Settings > Menus, before adding or removing menu items, select the right template in the drop-down list.
To find out more about managing menus, we invite you to read these two tutorials:
In our example, we have different items to add to the menus of each template:
For the default template, in Settings > Menus, select the default template in the drop-down list and add:
- 4 widgets in the vertical menu (the list of pages, the Facebook and Twitter links, the RSS feed)
- 2 links in the horizontal menu
For Contact, in Settings > Menus, select the contact template in the drop-down list, then add:
- 2 widgets in the vertical menu (the contact details and the Google map)
- 2 links in the horizontal menu
For the photo album, in Settings > Menus, select the album template in the drop-down list, then add:
- 2 widgets in the vertical menu (the album categories and the latest photos added)
- 2 links in the horizontal menu
-
This gives the following for the homepage:
-
The Contact page:
-
The Photo album page:
Delete a menu template
You can delete a menu template. In Settings > Menus, select the template in the drop-down list, then click the Delete button. If you delete all your templates, the remaining default template will be applied to every area of your website.