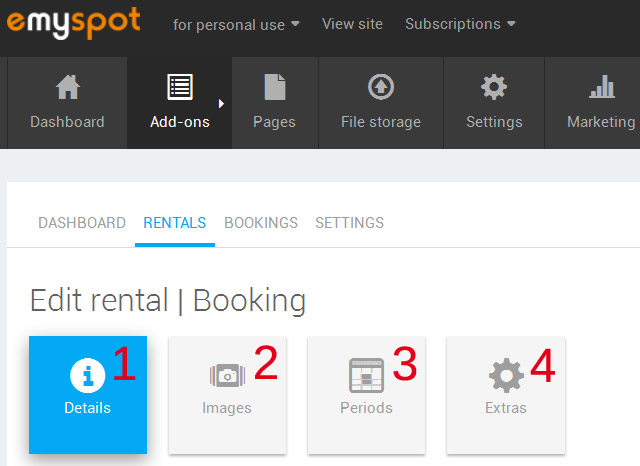
Once you have added a description, you need to fill in the basic settings. To do this, in the Details section you will choose:
Number° of simultaneous bookings allowed: you must decide how many times can a rental could be booked at the same time? If you have 3 similar hotel rooms, indicate 3. If the rental is unique, indicate 1.
Booking mode: indicate whether you want to book by day/night, a week or per hour (multiple booking in a single day). If you choose time slots, you can set different time slots for each day, as well as the duration of a time slot.
Type: Choose whether it is booked by night or by day. An overnight rental is suitable for a lodging or a hotel while a day rental is for example for a room rental.
Minimum n° days/night: In choosing the minimum number of days, no booking can be made under the minimum number.
Days open for bookings: Choose the day/days that you allow site visitors to book your rental by ticking the box.
Calendar weeks begin: We recommend you choose the day of the week that will be displayed first on the availability calendar.
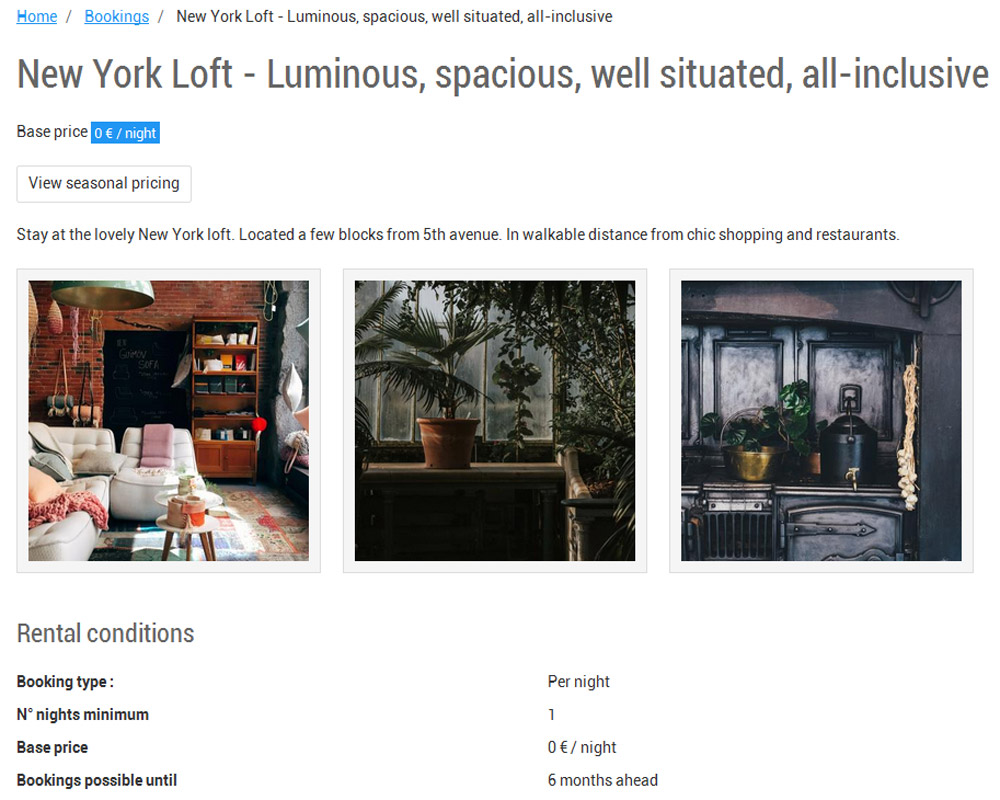
Pricing: Define whether booking is free or if you will require payment and the base price. This is the reference price of your rental. Your base price may vary in value or in%, depending on a period (eg summer) or a special day (more expensive on Sundays for example). To learn how to vary the base price depending on a day of the week or a period, we invite you to read the tutorial: vary the price of a rental per period. More details on setting up payment will be given in the guide section titled: Accepting online payments.
Bookings open for next: Choose between 10 years, which is basically saying available all the time. Or choose to define a period. Which is perfect for temporary office space, or for seasonal booking.
Availability display type: Choose between a calendar display which shows the month and the dates, with the pricing and the dates available for booking. You can tick whether you want to display unavailable timeslots and the whether to display the available number of rental places.
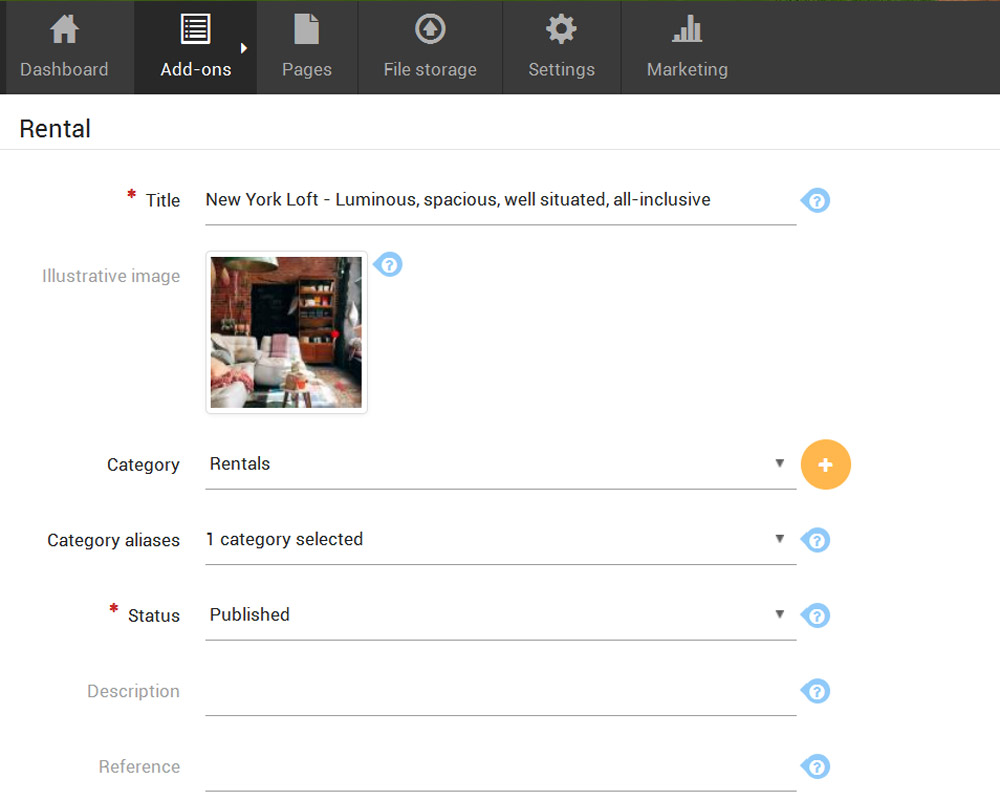 Add a title and a description
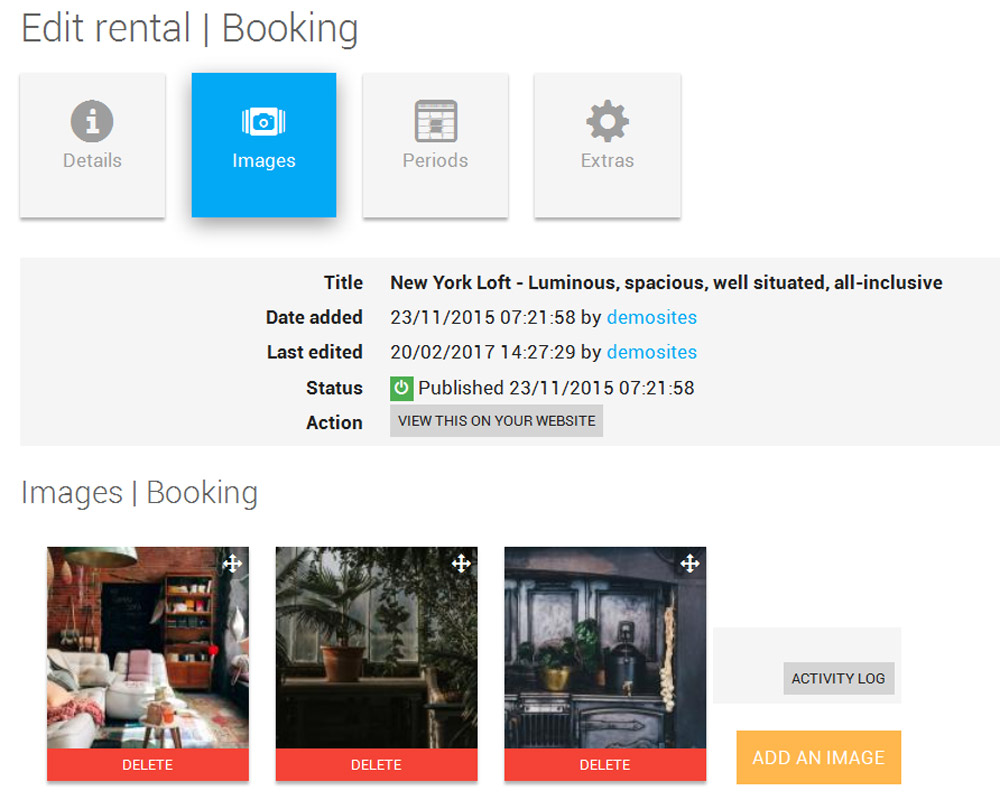 Add the photos